March 24, 2017 | Asher Stefani
It is a question that to most is easily answered, but for some reason it continues to come up all the time. Today we will dive in and take a deep look at both options along with the numerous pros and cons associated with each. There is a lot to say regarding both and I plan on touching every aspect not only to set the record straight, but also enlighten everyone on the facts that that should be considered when deciding between MGP Caliper Covers or Caliper Paint. To be fair, both solutions are better than having plain calipers showing through your wheels. However, by the end of this post it will be clear which wins the battle from a logical, beneficial and of course an appearance standpoint.
QUICK NOTE:
Some people will argue that both caliper paint and MGP Caliper Covers are fake big brakes or that they are only for fake people who wish they had big brakes.
FACT: Both MGP Caliper Covers and Caliper Paint are exactly as they sound…..caliper covers and caliper paint. They are in no way brakes or brake calipers.
You cannot replace brakes or calipers with caliper covers or caliper paint.
FACT: MGP Caliper Covers can be used with Big Brakes On Numerous Vehicles if you desire a cleaner look and protection for your expensive brakes.
***Also, if you would like to skip all of the details, scroll to the end of the blog post for a quick overview of both options***
Great, now that we got that out of the way, we will dive into MGP Caliper Covers and Caliper Paint!
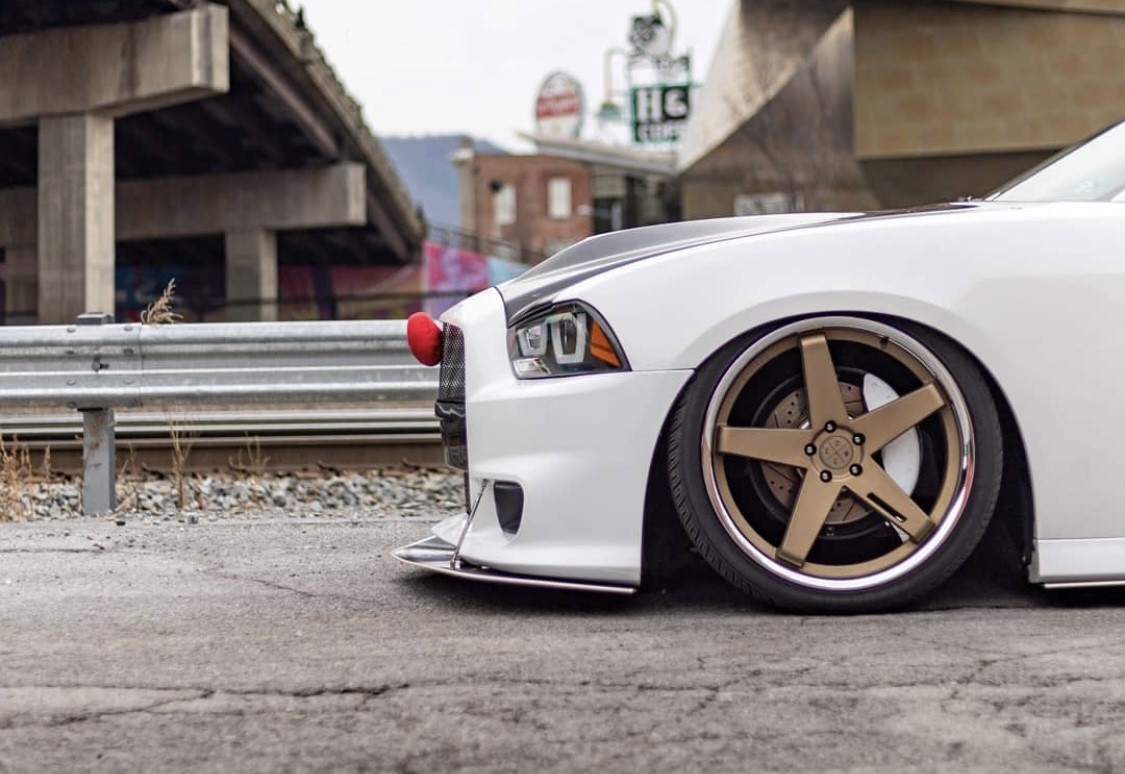
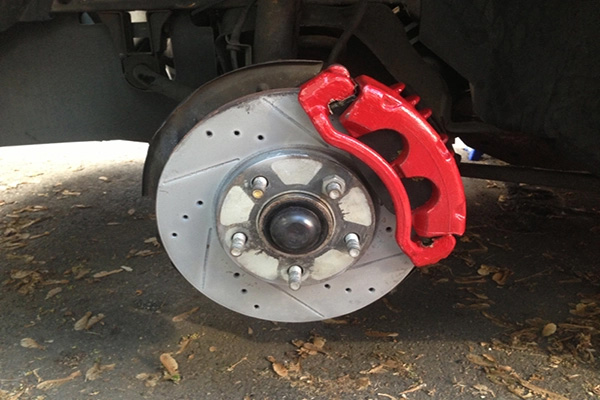
MGP CALIPER COVERS
MGP Caliper Covers have been thriving for over 8 years now and continue to rise as we show our amazing product to the world. It is a simple, yet extremely complicated product. Simple because of the ease for installing and complicated due to the fact that we make a specific fit for each vehicle year, make, model and sub-model to ensure that it is a perfect fit and goes on smoothly. On top of that, years of research and aerospace science technology have been put into MGP Caliper Covers in order to create a durable, safe and attractive product that has nothing but benefits for your vehicle.
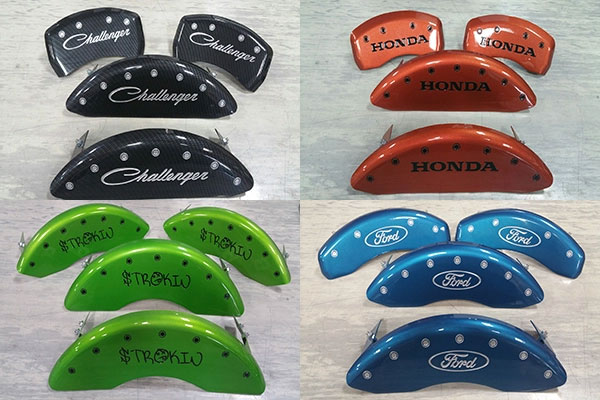
The beauty of MGP Caliper Covers is the infinite number of options you have when creating a set for your vehicle. Any custom color of your choice, any custom engraving of your choice, any custom color to fill the engraving and even if it is made at the highest level of customization you are still walking out the door spending only $200 to $500. Compare that to any other automotive product in that price range and you will not find the same level of quality, customization and durability for your vehicle. Take a spoiler for example.
Yes, you can buy one for around $200-$500, but if you want one more customized it is going to go up.
If you want customized floor mats, it will cost around $200 and there are many limitations.
Specialized lighting for inside and outside of your vehicle? Sure, but that can be around the same price and even more depending on how far you would like to go.
Bottom line is that MGP Caliper Covers are one of the most (if not the most) customizable, durable and high quality products you can purchase for your vehicle in the $200-$500 price range. Please feel free to throw some ideas and comparisons in the comments at the end of the blog post so we can have a discussion!
I digress, let’s jump into the installation process for MGP Caliper Covers
Time Frame: 1 hour
Items Required:
- Car jack
- Drill to remove lug nuts and tires
- Wrench
- Goggles (Always wear your safety goggles just in case)
INSTALLING YOUR MGP CALIPER COVERS
Installing the Fronts:
- Make sure your vehicle is in park with the emergency brake in place on a level surface
- Wear safety goggles and raise vehicle to place the jack stands under (If you do not have a jack stand you can do this one tire at a time as well)
- Remove front wheel with lug or impact wrench.
- *Make sure you have separated the front from the rear caliper covers and have kept the correct clips for the fronts and rears*
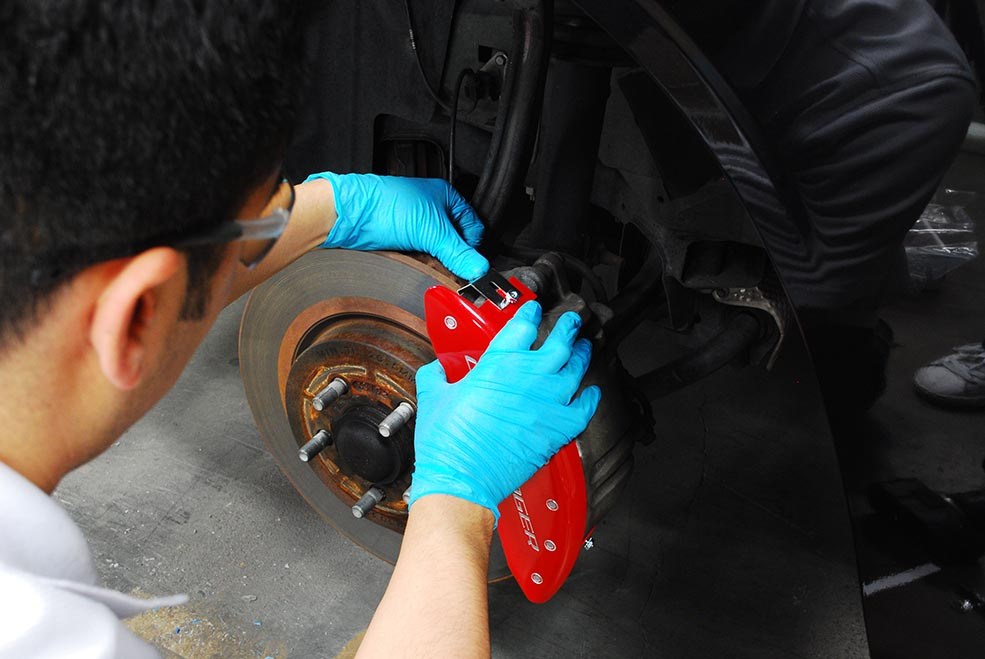
- Place the caliper cover on the brake caliper and then slide the mounting clip on. Keep the caliper cover as snug and centered against the brake caliper as you can
- Make sure you slide the top of the clip underneath the fastening lock nut. (The bottom side of the clip should slide easily between the caliper bracket and the rotor)
- Tighten down the lock nuts
- Test for clearance using the paper feeler gauge that comes with the caliper covers set to make sure there is clearance between the rotor and the clip
- Repeat process on other front caliper and then reinstall the front wheels
- *Once wheels are back on, make sure that when you rotate the wheels they do not rub or touch the caliper cover* (be careful not to damage the caliper covers while attaching wheels)
- Lower vehicle and finish tightening lug nuts
Installing the Rears:
- Make sure your vehicle is in park with the emergency brake in place on a level surface
- Wear safety goggles and raise vehicle to place the jack stands under (If you do not have a jack stand you can do this one tire at a time as well)
- Remove rear wheels with lug or impact wrench.
- Remove lock nuts from the mounting clips and place them to the side
- Slide the mounting clip on the rear caliper bracket from the top
- Repeat on the bottom bracket
- Place caliper cover over the rear brake caliper so the holes are lined up with the studs on the mounting clips
- Rotate to get the second clip stud into the hole on the opposite side of the caliper cover (A slight stretch of the cover may be required, but is completely fine and only adds to the secure fitment)
- Tighten down with the lock nuts we had set aside earlier (do not over tighten)
- Use the paper feel gauge again to make sure there is clearance between the brake rotor and mounting clips
- Reinstall rear wheels and make sure they do not rub or touch the caliper cover (be careful not to damage the caliper covers while attaching wheels)
- Lower vehicle and finish tightening lug nuts as required.
MGP Caliper Covers are known for their simple and fast installation and the above step by step instructions shows just that. It typically takes an hour or so to install all of them. Combine the simple installation with the full-blown customization and affordable cost to create a truly amazing product.
Now, let’s take a look at painting your caliper, the options and their processes.
PAINTING YOUR CALIPERS WITH CALIPER PAINT
Let us begin this segment by explaining caliper paint briefly so we are all on the same page. It is literally as it sounds. Some people choose to paint their brake calipers so they look nicer through their wheel. There are a number of ways to do this, but only one way to do it right and it is not an easy affair.
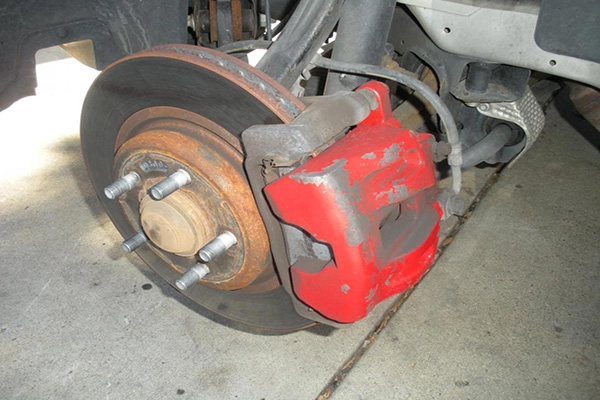
Yes it is basically what it says, “Painting your calipers” and yes it sounds so simple right? The honest answer and the simple truth is that there is a fairly stringent process to have this done right. Just slapping some random paint on your calipers will most certainly not do the trick here. (See image below)
OPTIONS FOR PAINTING YOUR BRAKE CALIPERS
Simply throwing some paint on them quickly
This option I would never, ever recommend no matter how slight the budget may be and quite frankly no matter what the situation is. (Unless you lost a bet…..a bet is a bet after all so do not risk having to do this in any bets)
Why you may ask? (I could ask you the same question here if you are considering this option)
- Any old paint will not last and may not even stick and the extreme heat of the caliper (which get hotter than engines at times) will simply melt the paint right off.
- It does not look good
- It is simply a waste of time as you will need to repeat this option potentially once every week because the paint will not last much longer.
Painting Your Calipers With REAL Caliper Paint By Yourself
This option is definitely better than the first one because you are actually using paint specifically made for brake calipers so it will last a bit longer. (Notice the word “bit”) The reason for saying it this way is because like option one above you will still have to continue to repaint your calipers over and over again. It may be every few months instead of every week, but this paint chips, fades and simply is not made to last which is why it does not come with a 1, 2 and never a 3 year warranty.
Here are the facts:
- You can purchase REAL caliper paint for anywhere from $15 to $50 if you want a kit to start you off, but you will have to continue to paint them every 3-5 months until you simply decide to stop.
- This paint WILL chip, fade, crack and not last as long as you would like
- Have you added up the cost for 3 years of painting your caliper covers yet? (I have, and it will equate to $180 to $600)
- The above cost over 3 years does not include the manual labor and time you will need to put in over that time span to maintain them….MGP Caliper Covers come with a 3 year warranty.
THE PROCESS FOR PAINTING YOUR CALIPERS PROPERLY BY YOURSELF
Time Frame: 3-5 hours (up to a full day and 24 hours for them to dry)
What You Will Need
- Paint (specific caliper only paint that can withstand the extreme heat)
- Small and soft paint brush
- Goggles
- Acetone
- Paint tape
- Rags
- Grease cleaners
- Floor jacks
- Spray solvent
- Drill with a wire brush
- Breathing mask
- 3 to 5 hours of labor
Step 1: You must decide upon and purchase a caliper paint kit or caliper paint by itself. (You will need all of the above items with or without the kit)
Step 2: Preparing your Calipers
Preparation is not quite as easy as you would like, but it is a very important step in the process because if the calipers are not prepped right then the paint will last far less time than expected making all your hard work basically a waste. With that said, take this step seriously if you plan on painting your calipers on your own.
Some people prefer to remove the calipers to paint them, but if you are doing this on your own I highly suggest you do not remove them unless you absolutely know what you are doing. If you remove your brake calipers and put them back on incorrectly or accidently damage them or the brake line it is a safety risk that could cost you a lot more than just money.
IMPORTANT NOTE: Be prepared to NOT drive or move your car for at least 24 hours after you paint your calipers. Pick your day and time wisely so it fits your schedule.
Caliper Preparation Steps:
- Have your vehicle on a level ground and ready to sit for at least 24 hours
- Be sure to set the parking brake and lift it with floor jacks
- Remove all four wheels (Might as well rotate your tires when you are done)
- Put tires in your garage and begin cleaning your calipers
- Clean with solvent or specific brake cleaner and be sure to use the drill with a wire wheel attached as this will make your job easier
- BE SURE TO WEAR GOGGLES AND A BREATHING MASK…..THIS IS VITAL
- Remove leftover dirt and grime with a grease remover
- Spray another coat of specific brake cleaner
- Wipe and dry thoroughly
Step 3: Applying Paint To Your Calipers
Applying paint to your calipers requires some delicacy and strategy to avoid paint getting on the wrong places and dripping all over. This is important because you do not want to have paint all over your garage floor or driveway.
Steps For Applying Paint To Your Calipers:
- Put your drop cloths in place
- Bust out your paint tape and tape anywhere that you may accidentally hit with your paintbrush surrounding the calipers (Tape MUST be secure)
- Double check to make sure there is NO brake cleaner left on the calipers because the caliper paint will not stick if there is even the slightest bit of cleaners. (If needed, clean with degreaser to ensure there is nothing left on the calipers and dry thoroughly)
- Now carefully spray each caliper with a coat of paint and be sure to take your time, spray evenly and try your best to not overspray to avoid the paint running
- Let the paint sit on each caliper for a bit (maybe 10-15 minutes) and continue this process at least 5 to 6 times per caliper to make sure the paint is properly applied.
- Let the calipers dry evenly and avoid clumps or runs at all costs
- Between each spray, wipe down first then respray
- This is going to be a long process so you may as well take your time and do it right. After all, you have devoted a lot of time not including the 24 hours you will need to wait for it to dry properly
Step 4: Finishing Touches for a Job Complete
- Well, if you have made it this far through the paint process I commend you. However, we still have a bit of work to do.
- Time to remove the paint tape
- Be sure to peel it off carefully so you do not accidentally peel off paint with it
- Make sure there are no remnants of paint tape left on your car
- Once done with tape, put wheels back on and be sure to tighten the lug nuts
- Lower your vehicle and go show it off to your friends and family
So that is the paint your calipers yourself step by step plan for success. Next is the last option for painting your caliper covers that is just as strenuous and even more expensive than this option. Let’s dive in!
OPTION #3: HAVING YOUR CALIPER PROFESSIONALLY PAINTED
This option entails removing the calipers and then sending them in the mail (or taking them to a local business) to have them painted. Typically, you will need to mail them off to be professionally painted and it is not an easy or cheap task. The worst part is that eventually you will need to do this again to keep them looking okay on your vehicle. I have seen first-hand how much of a pain this truly is and how much longer it takes to make your calipers look just a bit better. If you are auto savvy and know how to work on vehicles then the first half of the process will not be so bad. However, if you are not this can prove to be a painstaking task and to be honest, it is not safe to remove brake calipers and then put them back on if you are not a mechanic.
Anyhow, here are the steps for the final option for painting your calipers.
Step 1: Remove Your Wheels
- Make sure the vehicle is parked on a flat and level surface
- Use the parking brake for safety
- Have the vehicle in park, or first gear if it is a manual transmission
- Block the wheels that are not being jacked up
- Loosen lug nuts on the front wheels
- Place jacks under the “jack point” and raise the vehicle
- Once raised, use jack stands to keep both driver and passenger sides of the vehicle elevated
- Remove your wheels and place them in your garage or out of the way
Step 2: Remove Your Calipers
- Remove the bolts (two) holding on the top portion of the caliper
- It should then slide off from there
- DO NOT YANK OR PULL THE BRAKE LINE
(If you accidentally yank or pull the brake line it will result in a strenuous task) - Cut a piece of wire hanger and use to hook from the upper control arm to the hole the bolt screws into
(This is to prevent unwanted tension on the brake line) - Will need to remove the caliper mount and supports too
Step 3: Clean Your Calipers
- Now that the top of the caliper is removed, it is time to CLEAN!
- Using a wire brush or a wire brush attachment on a drill is best
- You want them to look brand new. Should take an hour or two.
- You will need to do the same for the caliper mount and supports as well
Step 4: Mailing or Driving Your Calipers For Painting
Local caliper painting professional? Simply drive them over and wait however long.
- Mailing calipers to a professional painter?
- You will need to carefully package them so they are not banging into each other and cannot break out of the box you ship them in
- Take them to the post office (although I highly recommend UPS or Fedex as they are faster and a safer way to ship important items)
- Pay anywhere from $40 to $200 for shipping depending on how fast you want them to get there and you will probably need to pay for a return shipping label as well
- Don’t forget to pay the professional who will be painting your calipers for you 😉
QUICK COMPARISON: MGP CALIPER COVERS OR CALIPER PAINT
MGP Caliper Covers
Caliper Paint
- Fully customizable: any color, any engraving, personalized for you
- Easy and fast installation (within an hour)
- 3 year warranty
- You do not need to remove the calipers; they simply bolt onto the calipers
- Extremely Durable; powder coat lasts for years
- High quality, made with aerospace grade aluminum
- Product tested for safety to the highest standards
- Absolutely does not hinder or block air flow to the caliper itself
- Prevents junk and brake dust from engulfing your calipers
- Protects your calipers from loose gravel, rocks and more
- Licensed by Ford, Chevy, Honda, Mopar, Acura, GM and Shelby
- NOT customizable
- Difficult and time consuming process that could take a full day or even up to a couple of weeks
- No warranty
- Can be dangerous removing the calipers if you do not know what you are doing
- Cost effective depending on how you decide to do it (But to me, time is money and there is no quick and simple way to paint your caliper or have them painted)
- Looks nice, but does not last very long and can require multiple applications per year
- Does not protect your calipers in any way
- Not licensed or supported by any major or minor auto maker