

Installations
Step-by-step installs, real vehicles and DIY guides for MGP Caliper Covers.
Installation video
How to install MGP Caliper Covers

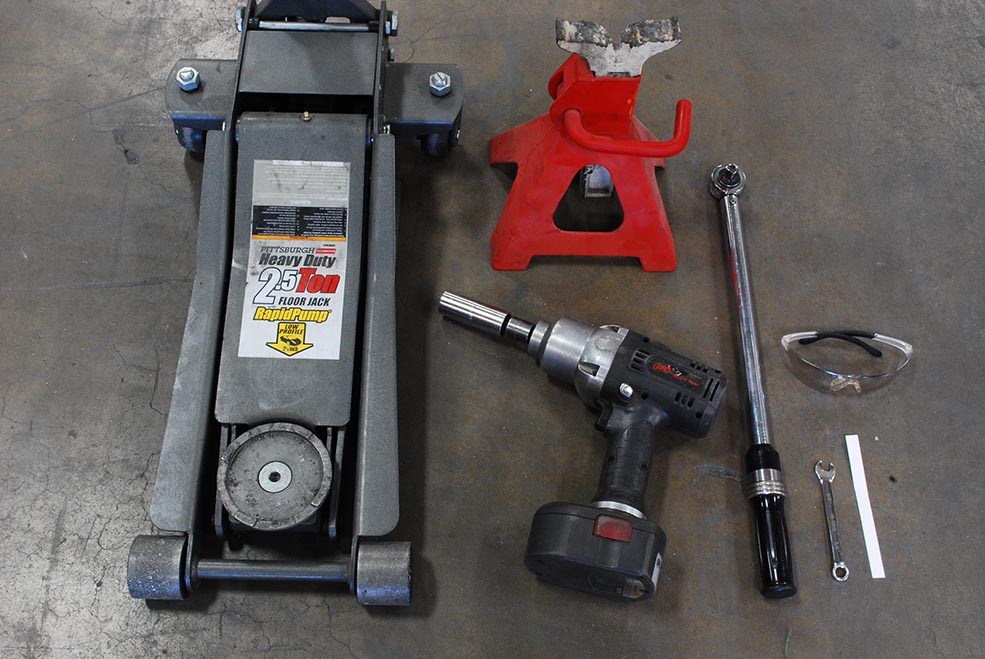
Tools required
Install MGP Caliper Covers at home in about an hour with standard car tools:
- Car jack
- Jack stands
- 3/8 inch wrench
- .013 feeler gauge (included)
Scan the QR code on the installation card in your box for instructions specific to your vehicle.
Park on a level surface and engage the emergency brake. Put on safety glasses, raise the vehicle per the manufacturer's instructions, and place jack stands under it. Never install without jack stands in place.
Step by step
Front installation
Each set is vehicle and caliper specific, so your configuration may vary slightly. Keep the labeled front and rear clip bags separate.

1. Remove the front wheel
Remove the front wheel with an impact wrench or lug wrench.
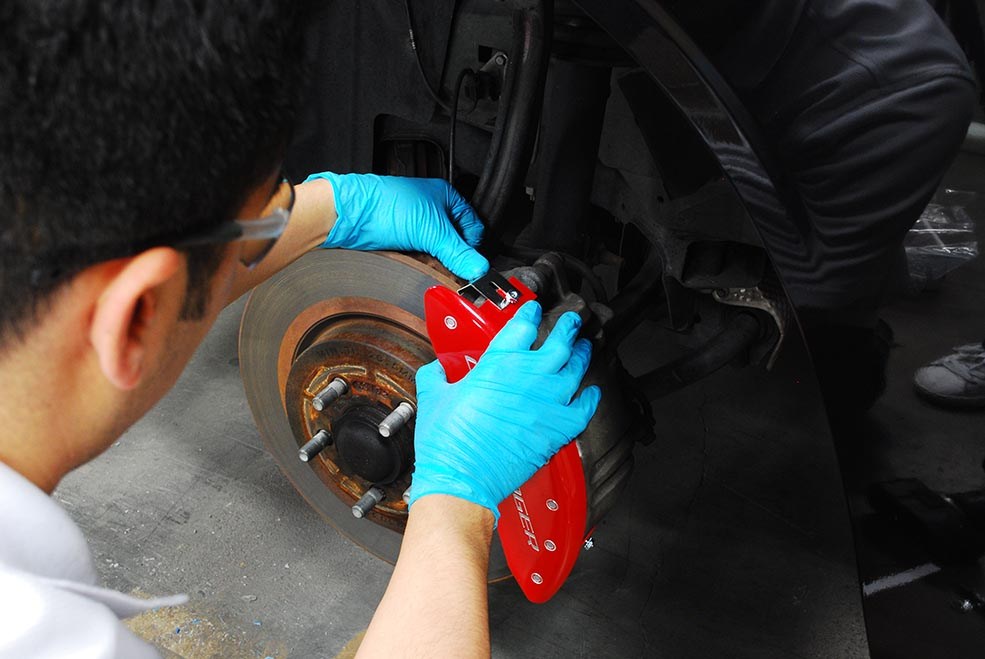
2. Position the caliper cover
Place the front caliper cover on top of the brake caliper and slide the mounting clip on while keeping the caliper cover centered and snug against the face of the brake caliper.

3. Slide the fastening clip
Slide the top of the clip underneath the fastening lock nut. The bottom of the clip slides in between the rotor and the caliper bracket. Repeat the clip installation on the other side.
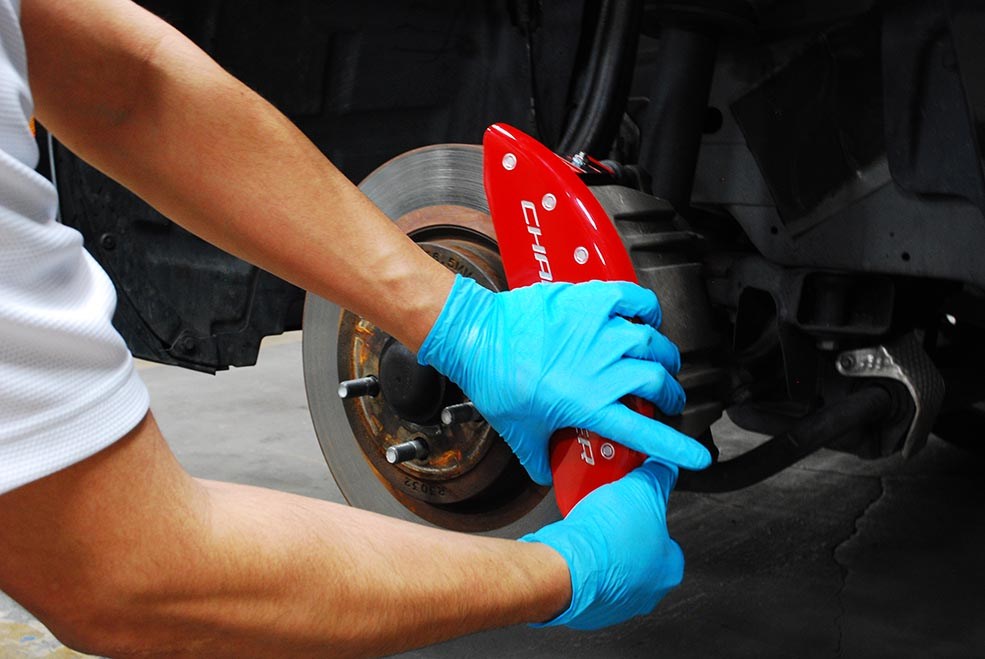
4. Align and center
Make sure the caliper cover is centered. Hand tighten the lock nuts.

5. Tighten the lock nuts
Tighten the lock nuts with a 3/8 inch wrench to 25 inch-pounds (about 1/2 turn past finger tight).

6. Check clearance
Use the included .013 paper feeler gauge to verify clearance between the brake rotor and the fastening clip. The feeler gauge should slide in and out without obstruction.

7. Reinstall the wheel
Be careful not to damage the caliper cover when installing the wheel. Verify that the wheel clears the caliper cover before lowering the vehicle. Remove the jack stands and lower the vehicle.

8. Repeat
Tighten the lug nuts to the manufacturer's specification with a torque wrench. Front installation is complete. Repeat for the brake caliper on the opposite side.
Step by step
Rear installation
The rear fastening system differs from the front. Before installing the fastening clips, remove the lock nuts and set them aside.

1. Attach the fastening clip
Slide the fastening clip onto the rear caliper bracket as shown. Repeat on the opposite bracket.

2. Position the caliper cover
Place the cover over the rear brake caliper and position the hole in the bridge over the threaded stud on the fastening clip. Rotate the cover to line up the second hole over the stud on the opposite clip. A slight stretch to reach the second stud is normal.

3. Tighten the lock nuts
Reinstall the lock nuts you removed from the fastening clips. Tighten to 25 inch-pounds (about 1/2 turn past finger tight). Do not over tighten.
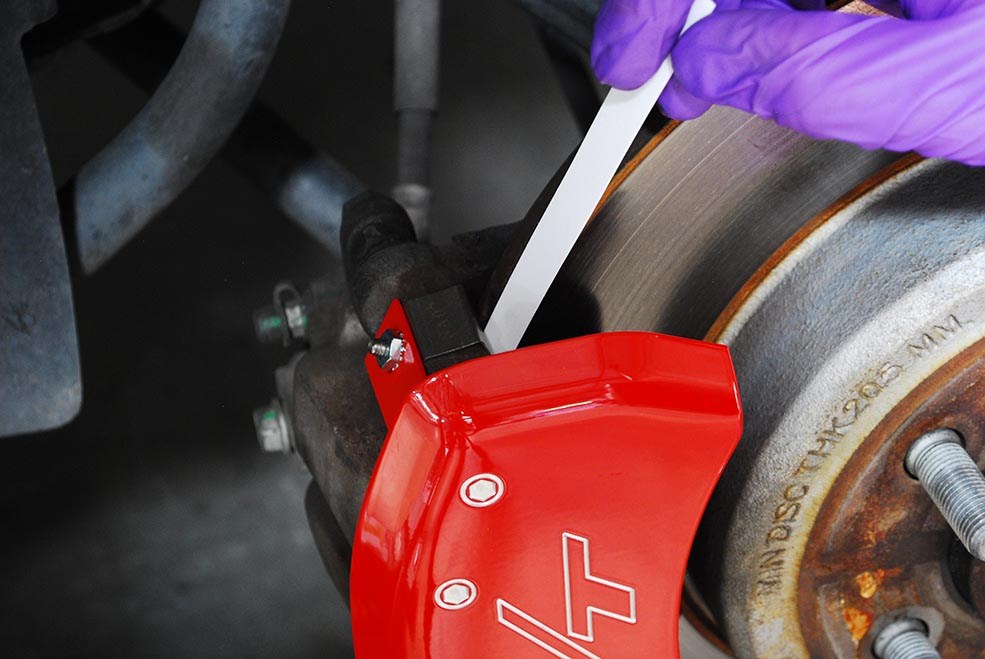
4. Check clearance
Use the included .013 paper feeler gauge to verify clearance between the brake rotor and the fastening clip. The feeler gauge should slide in and out without obstruction.

5. Reinstall the rear wheel
Be careful not to damage the caliper cover when installing the wheel. Verify that the wheel clears the caliper cover before lowering the vehicle. Tighten the lug nuts to the manufacturer's specification with a torque wrench, then repeat on the opposite side.
From the blog
Install guides and real vehicles

Athlete Adam “722” Enticknap Install
Installation FAQs
Yes! MGP Caliper Covers are designed for quick and easy installation. Each set comes with installation instructions and stainless-steel clips that attach directly to your calipers, and with basic tools, most installations take under an hour.
Every set comes with instructions and is designed for easy installation, but we’re here if you need help! Our live tech support is available Monday–Friday, 8 AM–4:30 PM PST. You can reach us at 877-995-0003 (option 1) or via Live Chat.
We provide basic troubleshooting on the initial call, but may request photos of your installation attempt, including clip angles and placement, as well as pictures of your covers and VIN.
If you can’t reach us by phone, please fill out the Contact Us form with these details. For off-hours or weekends, submit the form, and we’ll get back to you within 24–48 business hours.
Maybe. All R&D was completed using stock rims for every vehicle in our catalog. Aftermarket rims may still work, but you’ll need to check for at least 3 mm of clearance between the caliper and the inside of your rim, as well as between the caliper and the barrel. Rim size matters, but these spacing requirements are based on stock rims.
You are welcome to send us photos and measurements to help confirm fitment.
Have another question?
Shipping, returns, fitment and more are answered on our main FAQ page.